

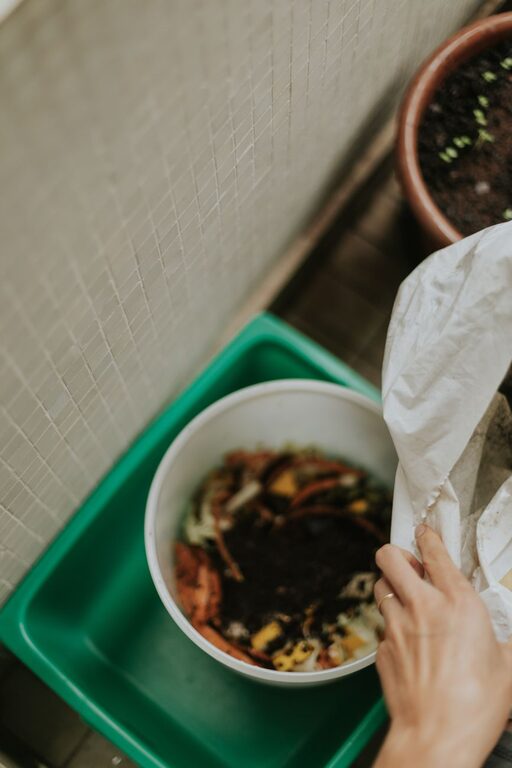
Composting is a simple way to turn everyday food scraps and yard waste into a useful soil amendment. Instead of sending organic waste to the trash, you can let it break down naturally and use the finished compost in gardens, flower beds, containers, or around trees.
Starting a compost pile does not require expensive equipment or a large yard. With the right mix of materials, enough moisture, and regular airflow, beginners can create compost at home with little effort.
Choose a Composting Method
Before collecting scraps, decide which composting method fits your space and routine.
Outdoor Compost Bin
An outdoor bin is a good choice if you have a yard, patio, or other well-ventilated area. Store-bought bins are convenient, but you can also create a simple pile or use a container made from wood, wire, or other suitable materials.
Choose a location that is:
– Easy to reach throughout the year
– Protected from strong winds
– Well-drained
– Partly shaded or exposed to moderate sunlight
– Away from standing water
A convenient location makes it easier to add materials and turn the compost regularly.
Indoor Worm Composting
Worm composting, also called vermicomposting, uses certain worms to break down food scraps in a ventilated container. It can work well for apartments, classrooms, and homes without outdoor space.
Worm bins require more careful management than a basic outdoor pile. They should be kept cool, moist, and protected from extreme temperatures. If you choose this method, use a container designed for worm composting and follow instructions for adding food scraps gradually.
Compost Collection for Community Programs
If home composting is not practical, look for local compost collection services or community gardens. Some programs provide collection bins or accept food scraps at designated drop-off sites. This option allows you to reduce waste without maintaining a compost pile yourself.
Learn the Two Main Material Groups
A healthy compost pile needs a balance of “green” and “brown” materials.
Green Materials
Green materials are generally moist and rich in nitrogen. They help support the microorganisms that break down organic matter. Common examples include:
– Fruit and vegetable scraps
– Coffee grounds and paper filters
– Fresh grass clippings
– Fresh plant trimmings
– Tea leaves and many paper tea bags
Brown Materials
Brown materials are usually dry and rich in carbon. They help create structure and airflow in the pile. Examples include:
– Dry leaves
– Small twigs
– Shredded plain cardboard
– Uncoated paper
– Straw
– Untreated wood chips
A compost pile made mostly of food scraps can become wet and unpleasant. A pile made mostly of dry leaves may break down slowly. Add both types of material and adjust the mix as needed.
Chop or Shred Materials First
Smaller pieces break down faster because they provide more surface area for microorganisms. Cut large fruit and vegetable scraps into smaller pieces before adding them to the pile. Shred cardboard and tear up large leaves when possible.
You do not need to process every item perfectly. Even rough pieces will eventually decompose, but smaller materials can help create a more consistent composting process.
Keep the Pile Moist but Not Soaked
Compost should feel similar to a damp, wrung-out sponge. If it is too dry, decomposition slows down. If it is too wet, the pile may become compacted and develop unpleasant odors.
To correct moisture levels:
– Add water gradually if the pile is dry.
– Mix in dry leaves or shredded cardboard if the pile is soggy.
– Cover the pile during periods of heavy rain.
– Avoid adding large amounts of wet material all at once.
Check the moisture when you turn the pile or add new material. Small adjustments are usually easier than trying to correct a major imbalance.
Provide Plenty of Airflow
The organisms that help create compost need oxygen. Without enough airflow, a pile can become dense and produce strong odors.
Turn the compost with a garden fork, shovel, or compost aerator every week or two. This mixes the materials, adds oxygen, and helps distribute moisture. If turning the pile is difficult, place coarse materials such as small branches or dry plant stems near the bottom to create air pockets.
Some compost bins have built-in ventilation holes. Even with a ventilated bin, occasional mixing can improve results.
Know What to Add
Many common plant-based materials can go into a home compost pile. Good starter materials include:
– Vegetable and fruit scraps
– Eggshells, crushed into smaller pieces
– Coffee grounds
– Plain tea leaves
– Dry leaves
– Grass clippings in small amounts
– Uncoated paper and cardboard
– Noninvasive garden trimmings
Add materials in layers or mix them together. For example, cover a layer of food scraps with dry leaves or shredded cardboard. This helps reduce odors and keeps the pile balanced.
Know What to Leave Out
Some items can attract pests, create odors, or break down poorly in a basic home compost pile. Unless you are using a specialized system, avoid adding:
– Meat and bones
– Fish and seafood
– Dairy products
– Greasy or oily foods
– Pet waste
– Diseased plants
– Weeds with mature seeds
– Coal or charcoal ash
– Glossy, coated, or plastic-lined paper
Some commercial composting systems can handle materials that should not go into a backyard pile. Check the instructions for your specific bin or local collection program.
Manage Common Compost Problems
Most composting problems are easy to correct once you identify the cause.
Bad Odors
A strong smell often means the pile is too wet, compacted, or rich in food scraps. Add dry leaves or shredded cardboard and turn the pile to improve airflow.
The Pile Is Not Breaking Down
A slow pile may be too dry, too cold, or made mostly of large materials. Add a little moisture, mix the contents, and add a variety of green and brown materials. During colder months, decomposition naturally slows down.
Flies or Pests
Cover fresh food scraps with a layer of brown materials. Avoid adding meat, dairy, and oily foods. Keep the bin covered if the design allows it, and make sure the contents are not exposed at the surface.
Too Much Moisture
If the compost looks muddy or water collects at the bottom, mix in dry leaves, shredded cardboard, or small pieces of untreated wood. Check that rainwater can drain away from the bin.
Be Patient With the Process
Compost does not form overnight. Depending on the materials, weather, moisture, and how often the pile is turned, it may take several months to produce finished compost.
Finished compost is usually dark brown, crumbly, and earthy-smelling. You may still see a few tough pieces, such as small twigs or eggshell fragments. These can be returned to the pile for more processing.
Use finished compost by mixing a small amount into garden soil, adding it around established plants, or blending it into potting materials as recommended for the plants you grow. Avoid placing a thick layer directly against plant stems.
Start Small and Adjust
The easiest way to build a lasting composting habit is to start with a manageable setup. Begin with a small bin, collect a few basic materials, and learn how your compost responds. Keep a supply of dry leaves or shredded cardboard nearby so you can balance wet food scraps as needed.
With regular attention, composting becomes a simple routine. It reduces household waste, supports healthy soil, and gives organic materials a useful second life.